Showing posts with label Home. Show all posts

Wednesday, September 19, 2012

Homemade Laundry Soap

If some of you have read my blog before you may know that I am a professed tightwad.  If I can get it free, even if that means jumping out of a car to grab it from the side of the road, I will.  Also, nothing bugs me more than spending money on something that literally goes down the drain within a few minutes of use.  I am talking about laundry soap.  I can't believe how expensive laundry detergent is.  It's almost criminal and you will agree with me when you find how few ingredients are actually in a container of soap and how easy it is to make your own.

Here is the list of items you will need:
1 five gallon pale with lid
1 bar Fels Naptha Soap, cut in half and grated
1/2 cup Borax
1/2 cup Washing Soda (not baking soda)
Water

Take your 1/2 bar of grated soap and put it in a saucepan with about 4 cups of water - you don't need to measure the water.  Turn on the burner and let the soap melt. *UPDATE - See Below*  This is the worst part of the process.  Fels Naptha has an extremely strong odor and if you have allergies this may cause you some discomfort.  (On a side note:  I do want you to know that the odor does not linger on clothes and not one person I know who uses this soap has had a problem with it when they do their laundry.)  Next, pour the melted soap mixture into your five gallon pail and add some more water, probably 1/4 full.  Then add your 1/2 C. of Borax and Washing Soda.  Stir. Lastly, add more water so the pail is half full and stir again. Cover and let sit overnight. The next day you will have a thick mixture, kind of like Jelllo.  Add more warm water so your pail is full and stir. Now, your soap is done. Disclaimer:  The constancy is a bit repulsive - I think it looks a bit like snot!

For easier use transfer some of your soap to another laundry detergent container or a container that is a thicker plastic.  Do not use a milk carton as it may erode the plastic.  For front loaders you use about 1/4 C. of soap and for top loaders 1/2 to 1 C. depending on how large your drum is.

I really think this is great soap.  It takes out odors and cleans well. Plus our family, with all its allergies, is able to use this laundry detergent.  And most importantly for me is the price.  Fels Naptha sells for a $1 a bar and you use so little of the Borax and Washing Soda that they will last you years.  I use almost a cup of soap in my top loader as it is a super capacity.  This comes out to more than 80 loads for less than $2.  If you have a front loader the savings is even more impressive:  320 loads!  You could almost do a load a day for a year and only spend $2!!!!

One last thing.  You may be wondering can you use any bar of soap.  Yes, but the ingredients of the Fels Naptha is what helps it clean so well.  But if you have a favorite bar of soap, try it out.  For a 4-H project we microwaved a bar of Ivory soap and I used the leftover Ivory to make a batch of soap and it worked quite well. Good luck and have fun making your own inexpensive laundry soap.


*UPDATE*  Instead of letting the soap melt on the stove in a pan of water I now grate my soap and place it in my 5 gallon pail.  Then I boil up 8 C. or so of water and pour it into the pail.  Place the lid on top, but DO NOT, I repeat DO NOT seal the pail as the next morning your pail will look as if someone ran it over with a large tractor - the pail actually will compress onto itself.  But within 12-24 hours your soap will have completely melted and gelled together.  Then heat up some more water and add to the bucket along with your 1/2 C of Borax and Washing soda and stir.  Add more warm water until it is half full.  Let sit 12-24 hours and add the rest of the water to make your 5 gallons of soap.  The reason I let the soap melt/dissolve instead of heating on the stove is I hate the noxious fumes wafting all over my home.  This way takes a bit longer, but I think it is much safer and healthier for those of us with allergies.

Monday, August 27, 2012

Between Eating Bon Bons

When my husband comes home after work I like to tell him I sat around all day eating bon bons and some days I probably do sit around more than I should, but usually my days are quite full.  One thing I love to do is decorating our old home, but throughout the school year I can barely keep the house neat and the family fed and, consequently major projects sit waiting for summer when we close down school for a well deserved break.  I love our home with its beautiful woodwork, hardwood floors, the quaint nooks and crannies, but it has one major defect: our house lacks storage space.

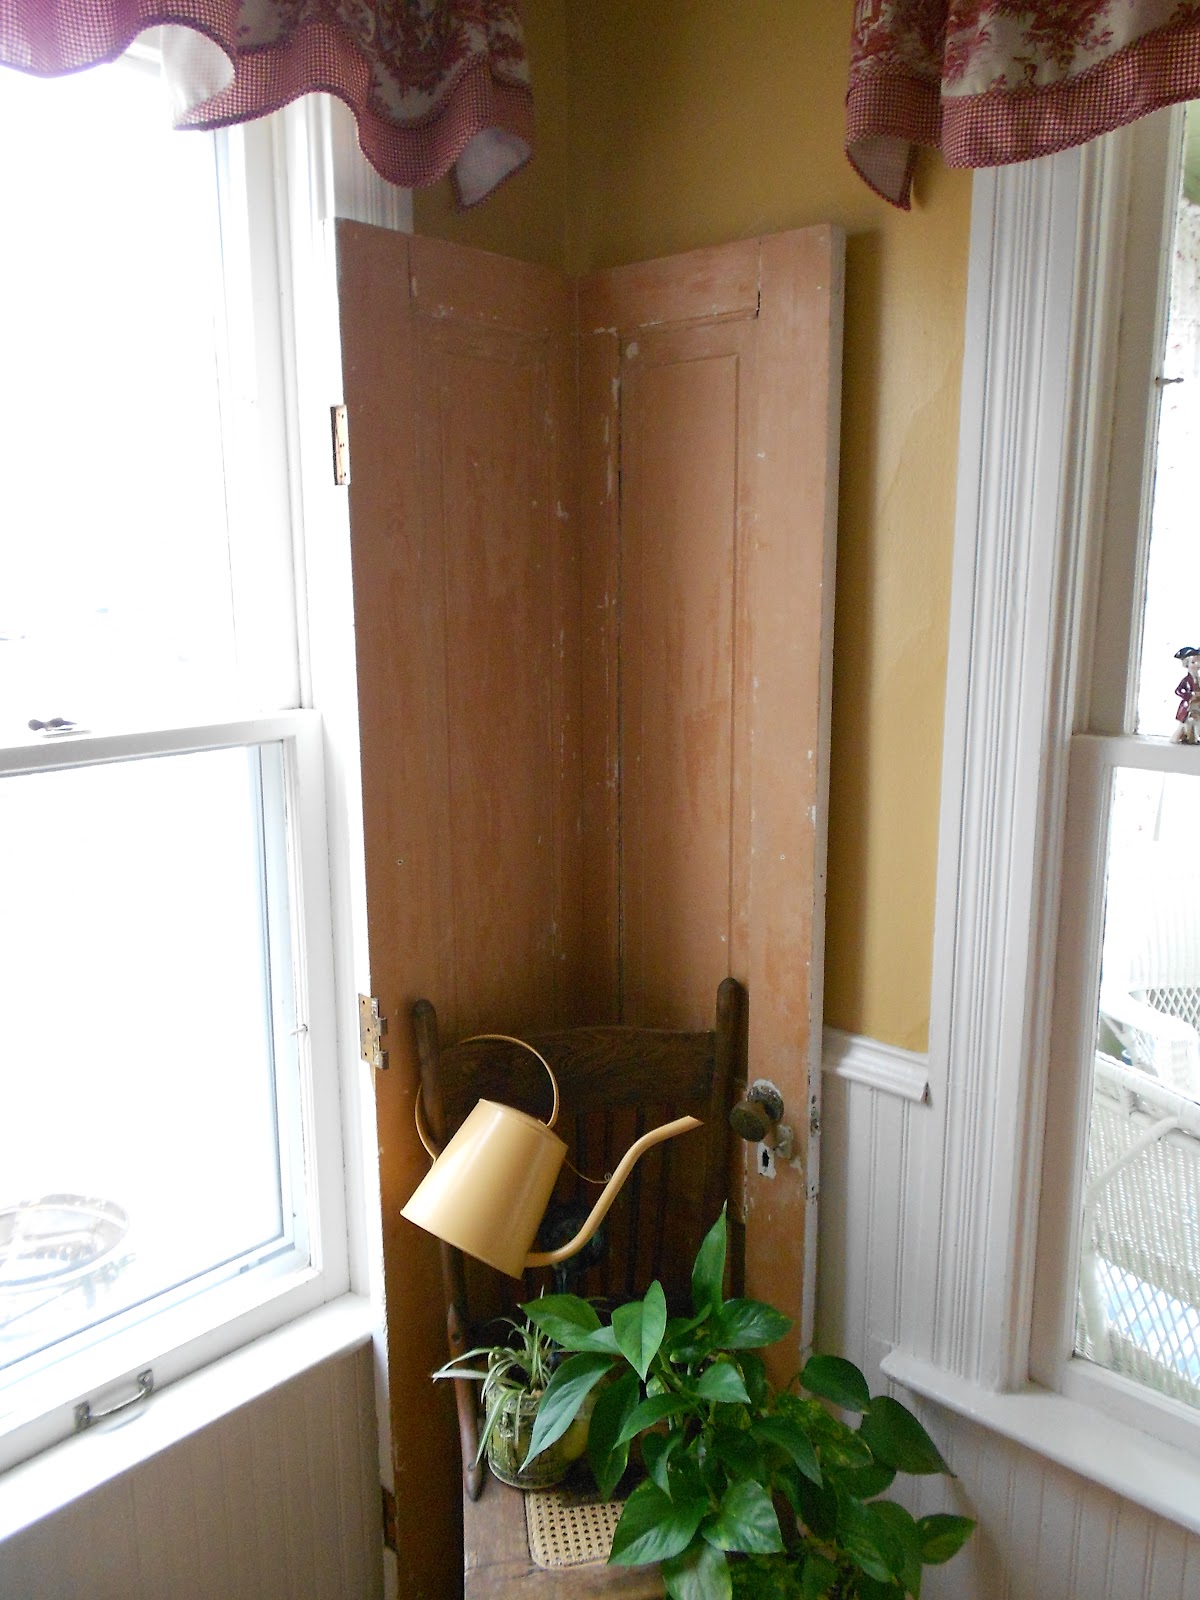
And so began a quest this year to add storage to the kitchen. One thing I also wanted to do was include a bit of charm along with it.  And the little cogs in my brain began to whir and spin and I headed for the garage to see what I could scrounged up. I came upon an old wooden door and took it to my neighbor to have him cut it in half.  After bit of elbow grease I had the paint removed and then I screwed the two halves together.  Due to my cheapness this sat in my kitchen all through the fall, winter and spring until this summer as I needed to find rounded shelves without having to purchase them.

To create the shelves I notified everyone I knew that I wanted a round table top.  We have a wonderful week in early spring here in Fargo, ND called clean-up week and one day there on the side of the road my sister found a table minus the legs.  This time I called upon my father's expertise and he cut the top into quarters and I then attached the 4 shelves to my door.  I reattached the door knob and the hinges, a bit of free paint from the local hazardous waste facility, and voila my corner shelf!

Now, my flour mill has a home on the bottom shelf and this has the added benefit of freeing up some precious counter space.  The rest of the shelves I am using to store last year's canned goods - this way I will use them up before they get too old.

For my next storage piece I wanted something to keep out the dust, but more importantly the dog hair which floats around our home in vast quantities.  Many years ago I was given two glass doors from an old farm house that was being demolished.  I also had an upper cabinet sitting in our garage and miraculously the doors fit the upper cabinet perfectly.  After thinking about what I could use for legs I went to the local hardware store and purchased newel posts used for decks and just flipped them upside down and screwed them into the bottom.  Some more paint from the hazardous waste and a couple of hinges and the cabinet is almost complete.  I still need something for the top and I am thinking of heading over to the local granite store to see if they have a small piece for a reasonable price, but even without a nice top I am quite pleased with the result.

No longer do I need to literally squat down to a height of 4 feet to squeeze under the stair landing in the basement to grab a jar of tomatoes for our spaghetti or a jar of jelly for breakfast. Another plus is I don't lose a jar of apple butter and find it three years later behind the salsa. Now all my canned goods are accessible to me and I hope by the end of summer I will have my glass cabinet almost full of tomatoes, crab apple jelly, stewed tomatoes, apple pie in a jar and jalapeno jelly just to name a few.

You may wonder what is now under the stair landing in the basement?  I now keep all our leftover paint in that teeny, tiny space.  Still irritatingly inaccessible, but at least I don't need a can of paint as often as a jar of tomatoes!

One more thing, please excuse my bad pictures.  I am not a photographer in any sense as you can tell, but I wanted you to see the finished projects.